
Forum Übersicht
5er BMW - F10 / F11 / F07 GT Forum
!Einbauanleitung: Klappensteuerung BMW M5 - M6 (geschlossen)
!Einbauanleitung: Klappensteuerung BMW M5 - M6
Hier die Einbauanleitung zur Installation der erweiterten Klappensteuerung von insidePerformance für den BMW M5 und BMW M6 (F10 / F12 / F13) (ebenfalls identisch beim 650i)(find the english installation manual in the second post below: here)
Die Klappensteuerung ermöglicht es, die verbaute Klappen-Sportauspuffanlage nach belieben zu steuern. Die Klappen können geöffnet oder geschlossen werden über den M1-Knopf am Lenkrad (bei den M-Modellen). Unabhängig von der Belegung und aktuellen Konfiguration des M1 Knopfes im M-Menü. Bei den nicht-M-Modellen (z.B. 650i) erfolgt die Öffnung der Klappen über den Fahrerlebnisschalter. Die Klappe ist im Modus "Sport" und "Sport Plus" dann geöffnet.
Die Steuerung funktioniert mit allen Klappenauspuffanlagen - egal welcher Hersteller. Sowohl mit der original verbauten Auspuffanlage, mit der BMW Performance Anlage, einer Akrapovic Sportauspuffanlage und natürlich auch mit der insidePerformance BMW M5 Sport-Klappenabgasanlage (und allen anderen). Auch beim Kaltstart können die Klappen geöffnet werden.
Eine ausführliche Produktbeschreibung sowie die direkte Bestellmöglichkeit gibt es hier.
Beispielvideo X6M:
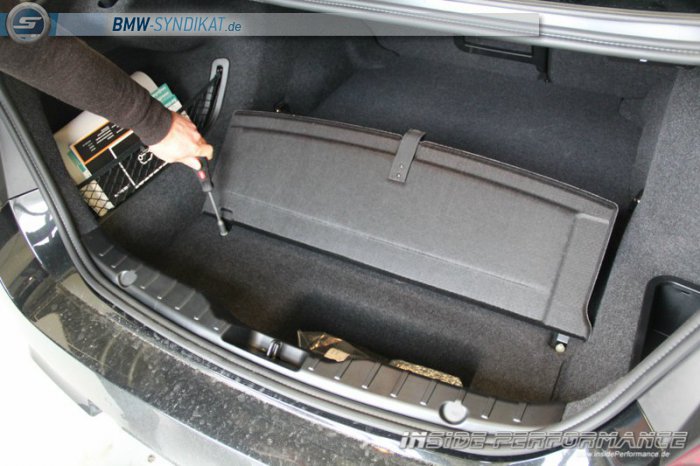
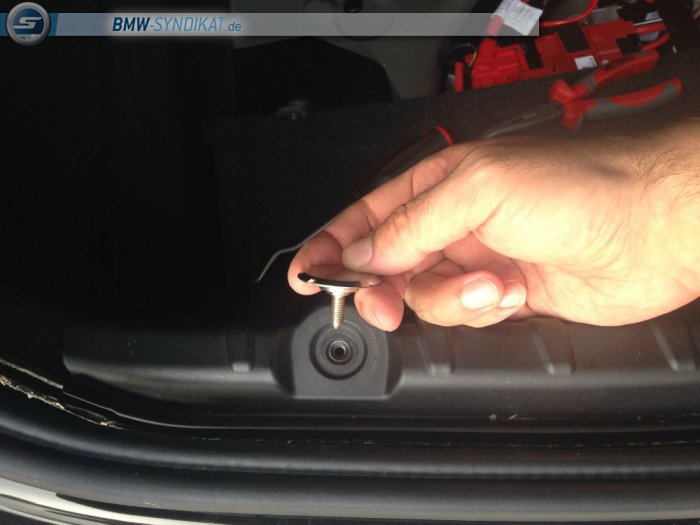
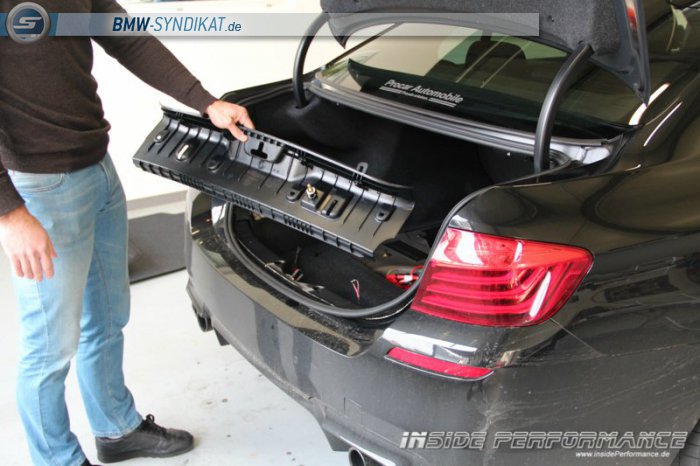
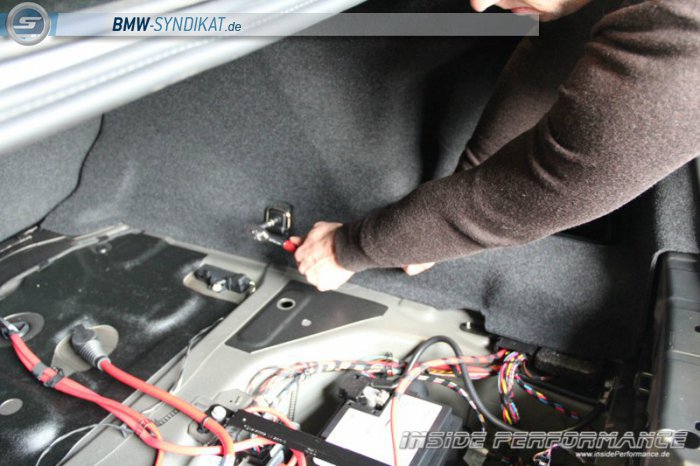
Zuerst wird der Kofferraumboden und die Klappe auf dem Boden entfernt (2 Muttern):
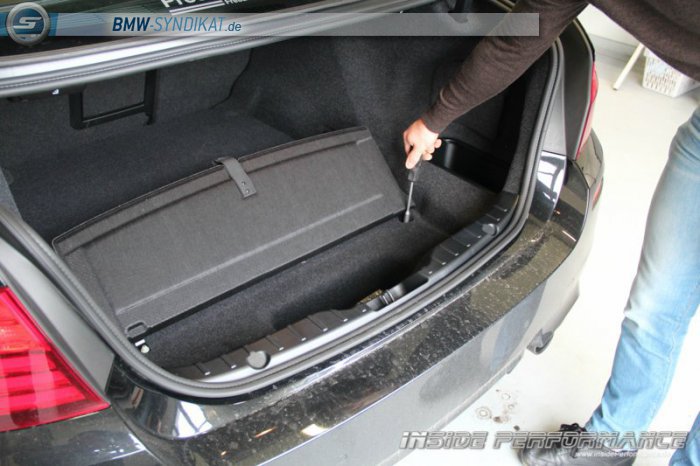
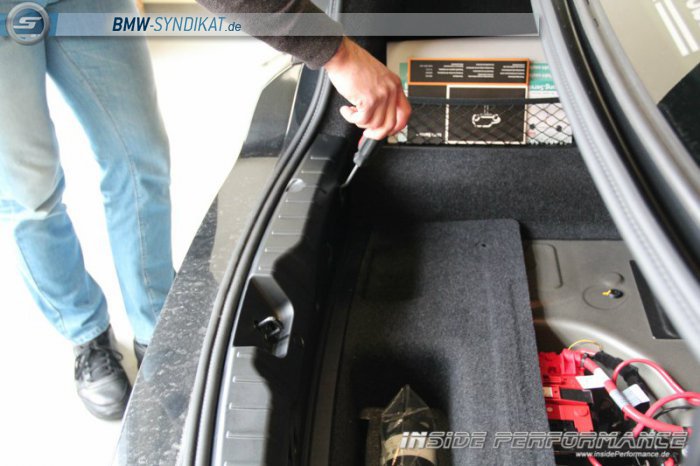
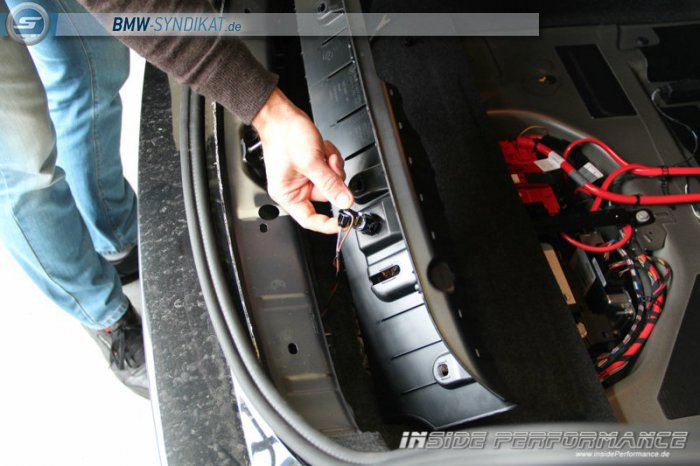
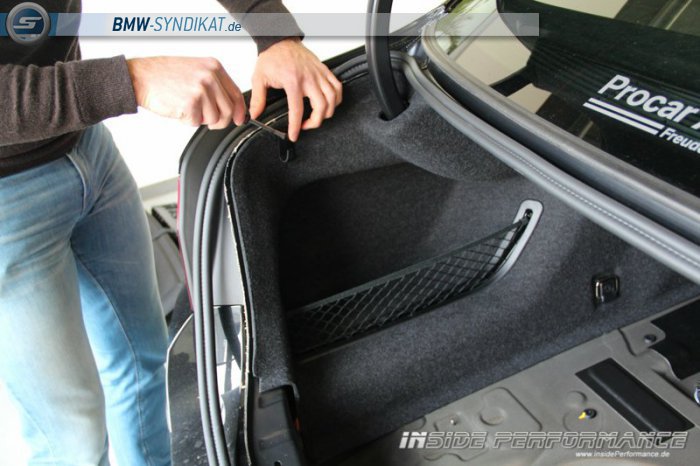
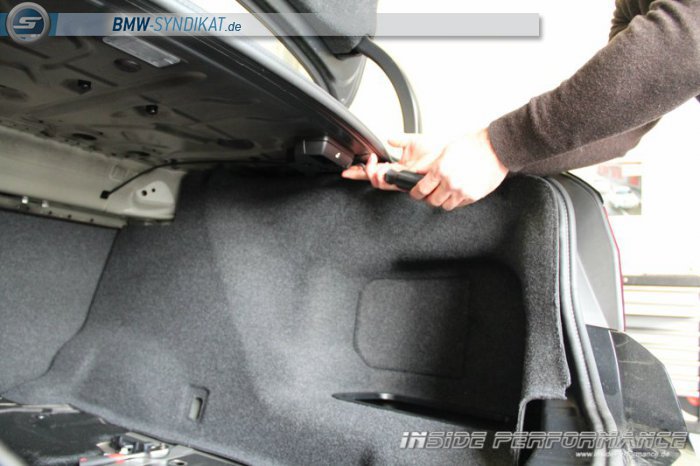
Dann wird das Plastikteil an der Ladekannte entfernt. Dieses ist mit einigen Spreiznieten von innen befestigt.
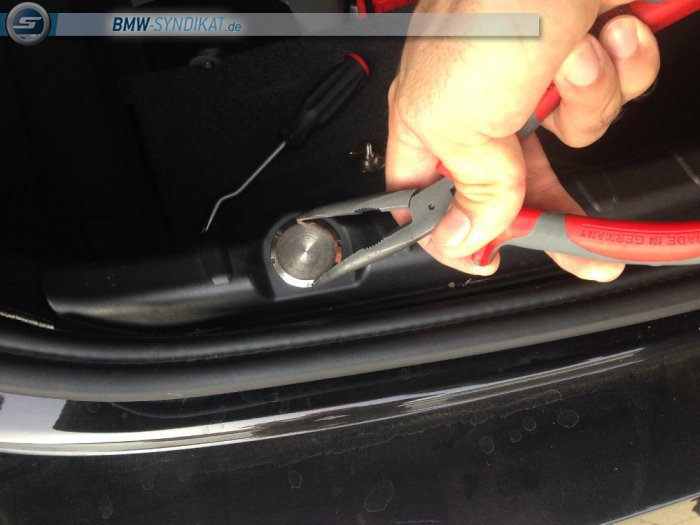
Beim M6 sind nach zusätzlich zwei Metallteller auf der Ladekannte verschraubt. Diese mit einer Zange in den Aussparungen greifen und losschrauben (Gewinde):
Außerdem (je nach Ausstattung) ist ggf. eine 12V Steckdose in diesem Teil integriert (M5) - den Stecker einfach abziehen:
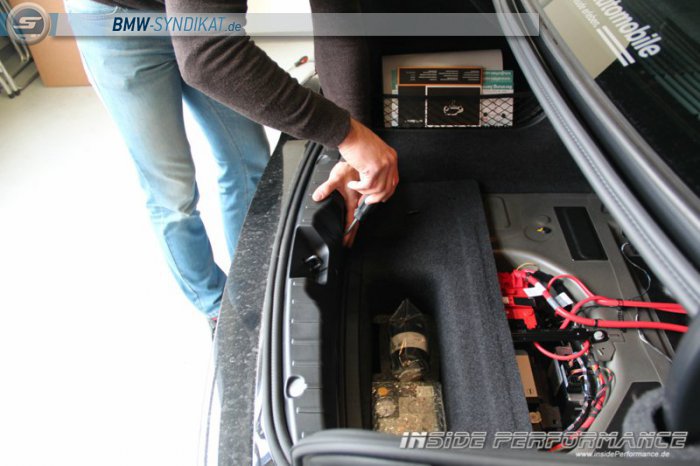

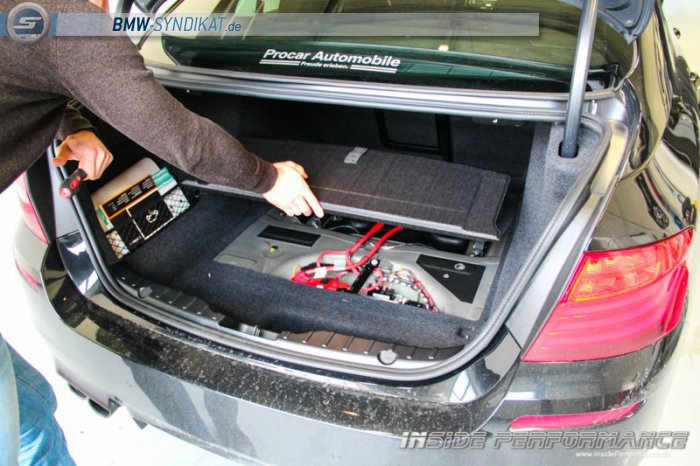
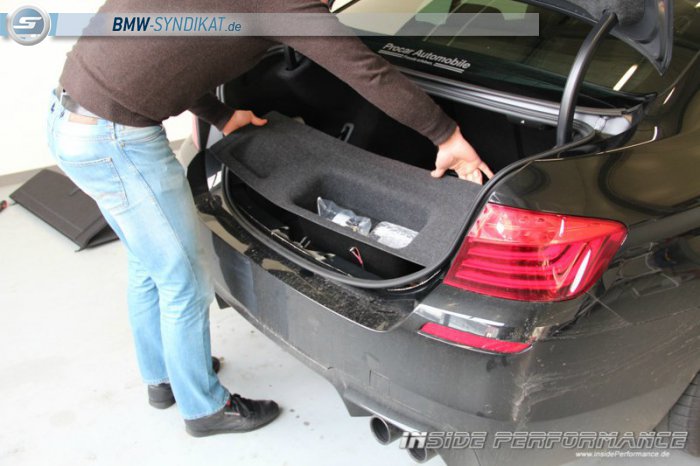
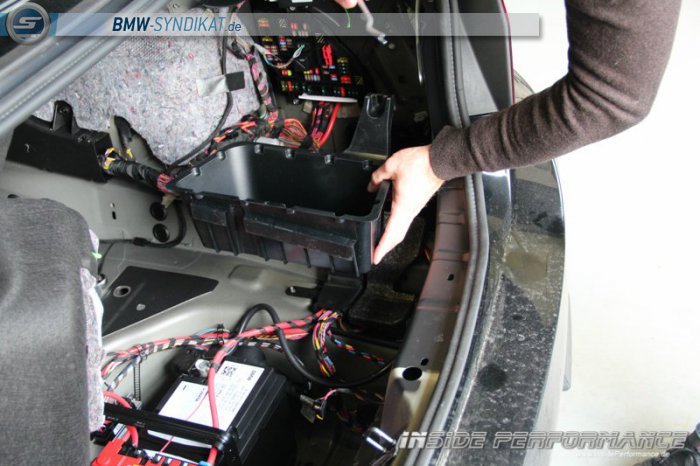
Nun kann man das Ladefach einfach herausnehmen:
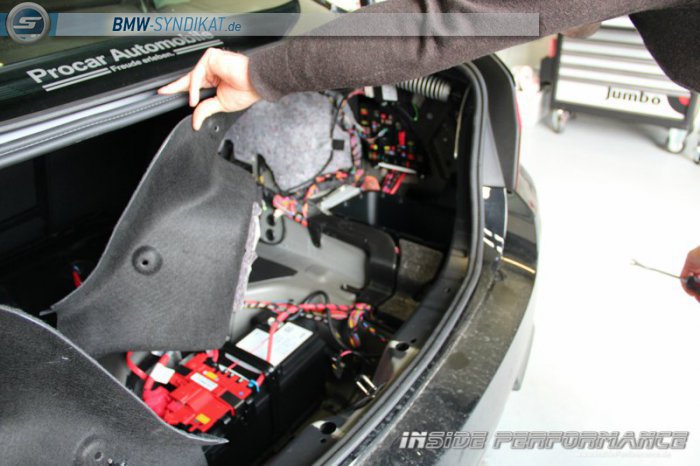
Die linke innere Seitenwandverkleidung kann man nach Entfernen von 2 Spreiznieren vorsichtig nach vorn klappen (man kann auch alle Nieten entfernen, sodaß das Teil komplett entfernt werden kann).
Beim M6 & M6 Cabrio sollte man ggf alle Nieten entfernen - außerdem ist hier noch eine Notfall-Verdeckentriegelung beim Cabrio - diese herausziehen und aushängen:
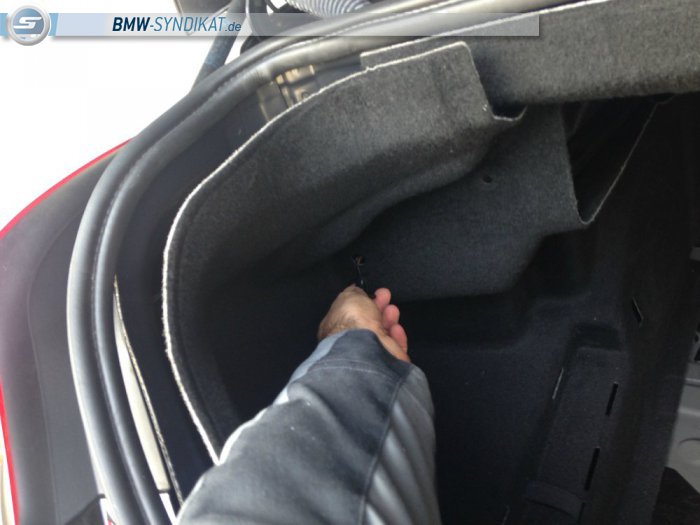

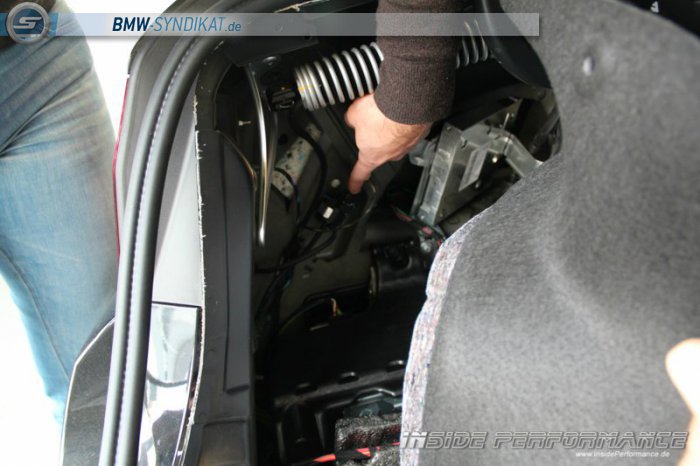
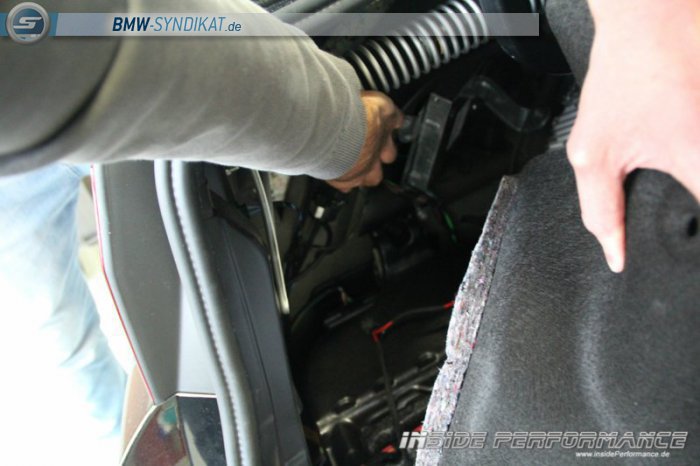
Direkt dahinter sieht man bereits die Unterdrucksteuerung für die Abgasklappe, an die wir die Klappensteuerung später anschließen:


An der rechten Seitenverkleidung entfernen wir 3 Spreiznieten sowie die Öse / den Halter für Kofferraumgurte (Torx) und klappen die Seitenwand nach vorn:
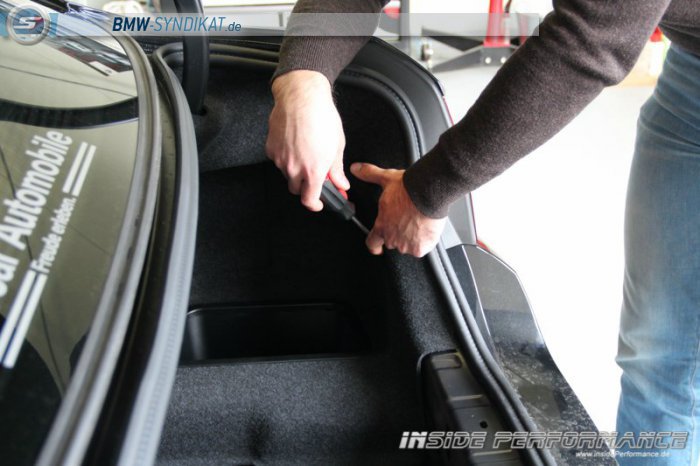
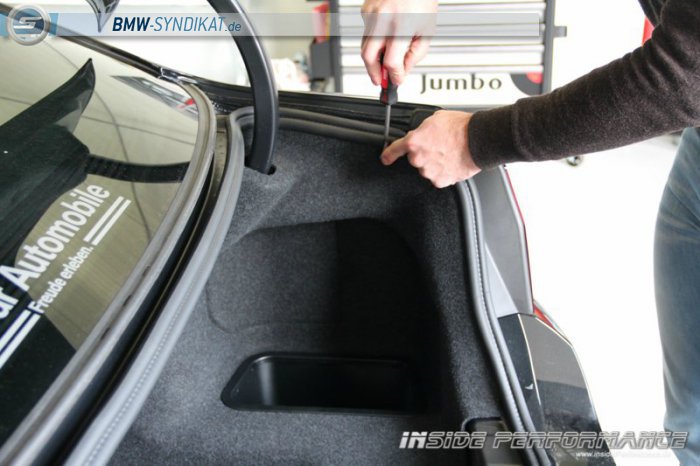
Jetzt entfernen wir rechts noch das Ablagefach (Spreiznieten):
======================
Fall A:
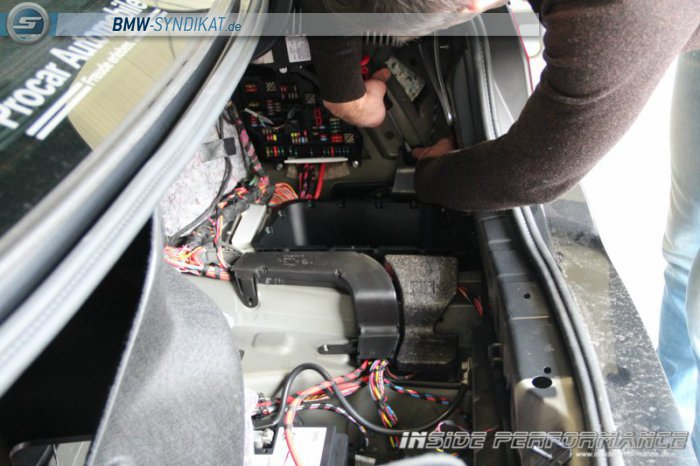
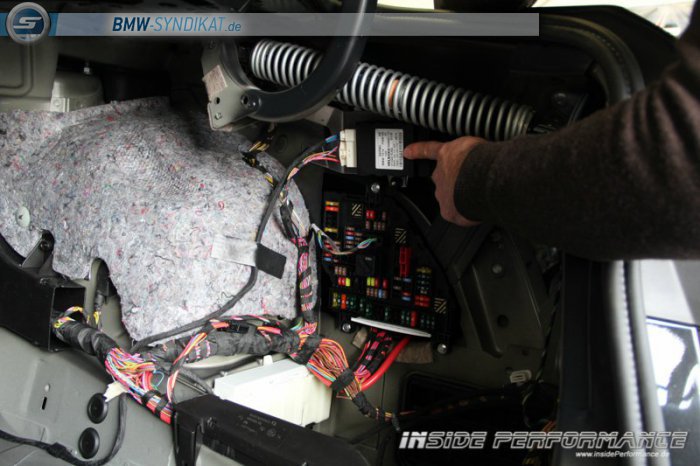
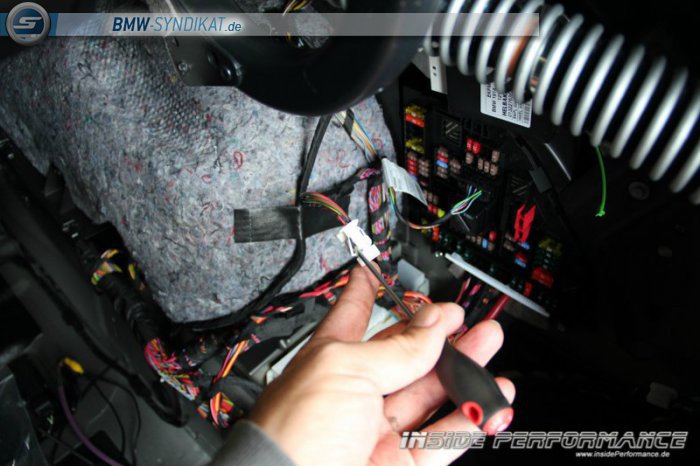
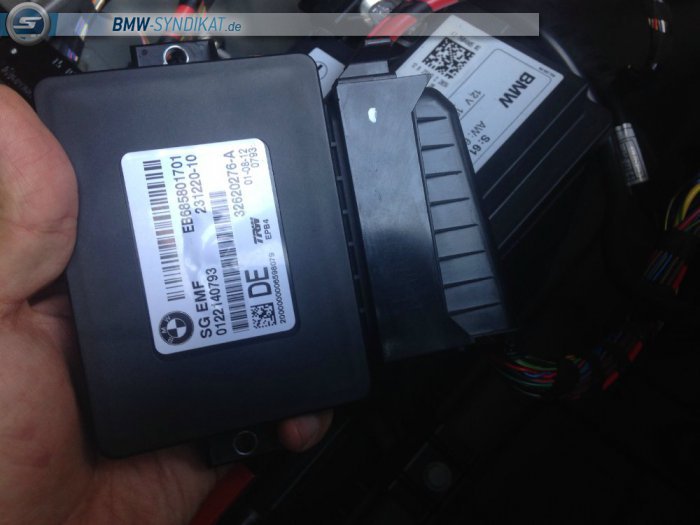
Rechts oben sehen wir das Steuergerät für die Benzinpumpe (M5).
[ Manche M6 oder M6 Cabrios haben dieses Steuergerät nicht - in diesem Falle weiter unten weiterlesen bei Fall B ]
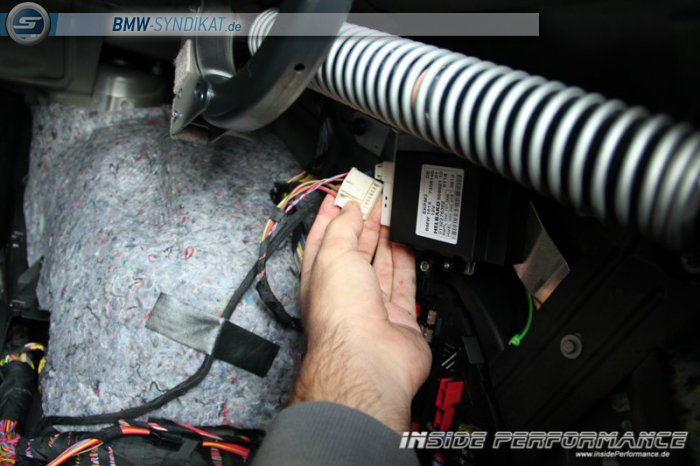
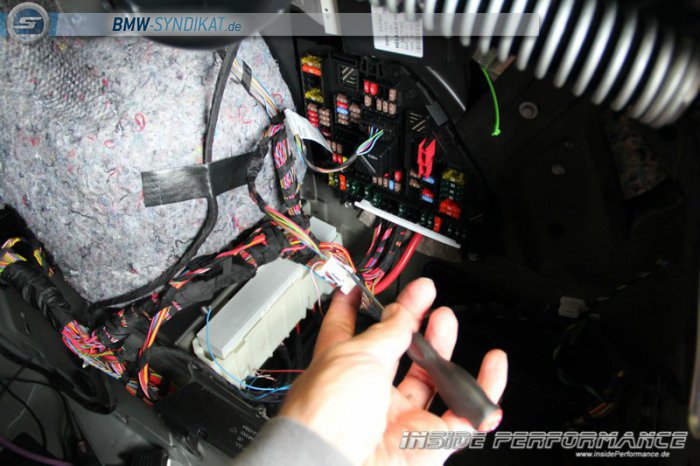
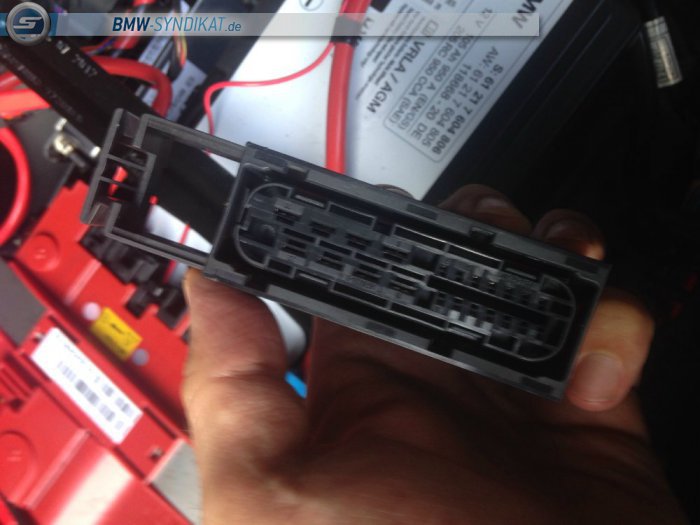
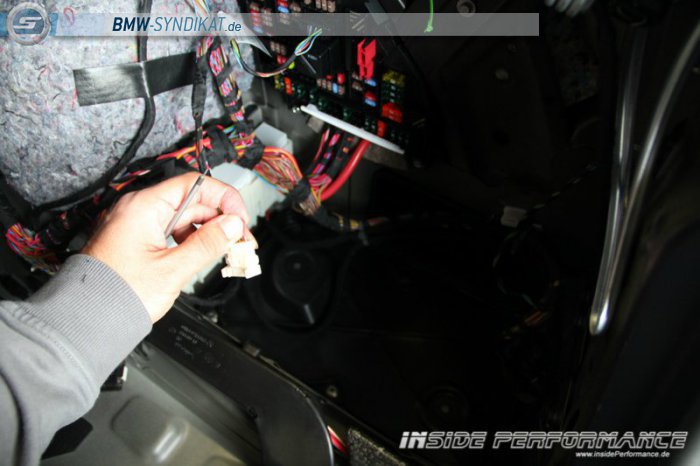
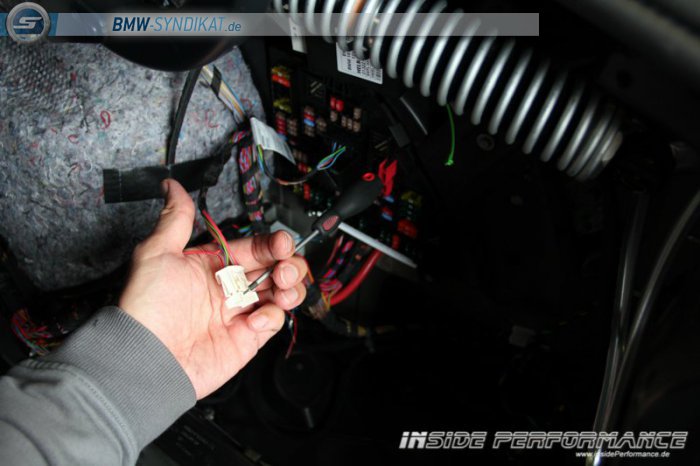
Den Stecker entfernen wir (Nase herunter drücken):
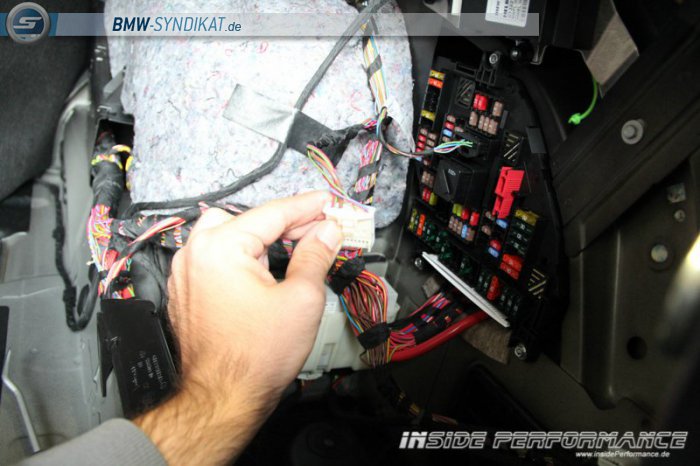
Am Stecker ist rechts und links seitlich wie eine Art "Klappe" / ein "Steg". Dieser sichert alle Pins im Stecker. Beide Klappen müssen vorsichtig gelöst und aufgeklappt werden:
======================
Fall B (M6 / 650i / Cabrio):
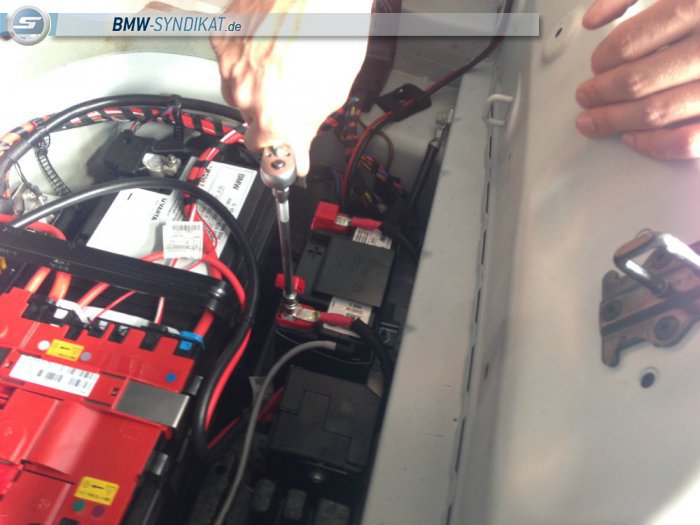
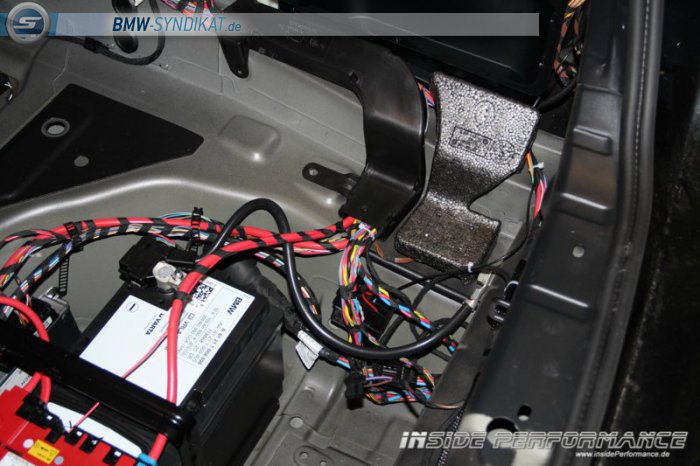
Sollte dieses Steuergerät nicht vorhanden sein (kann beim M6 oder M6 Cabrio der Fall sein), so kann auch das Steuergerät unten rechts vor der Batterie genommen werden (von Innen an die Außenwand / Rückwand des Fahrzeuges geschraubt). Bei manchen Modellen (Cabrio?) ist ggf. noch eine kleine Zusatzbatterie verbaut, die das Steuergerät verdeckt und daher auch herausgeschraubt werden muss:
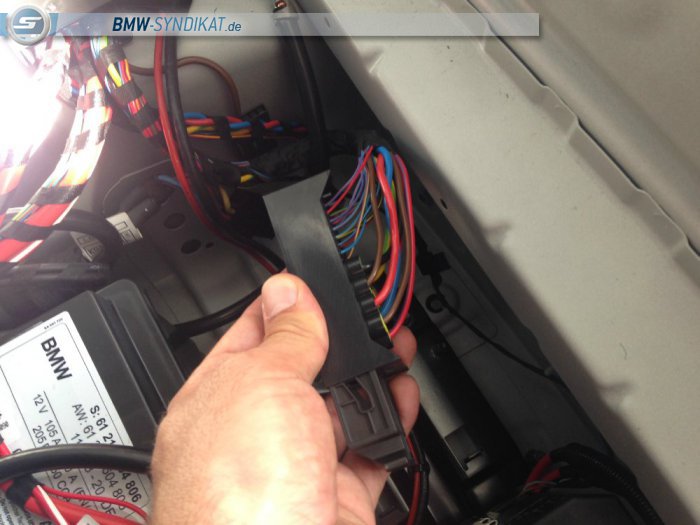
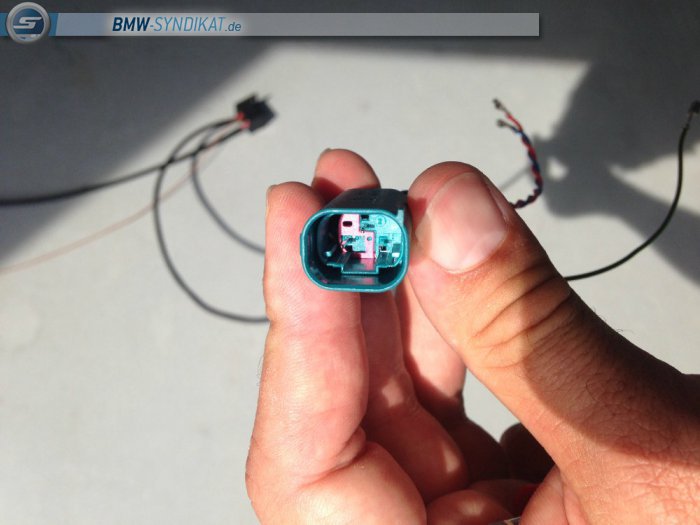
Nach lösen der Steckerverriegelung und lösen des Steckers wird die obere Kappe vom Stecker abgenommen:

Außerdem wird seitlich die blaue Verriegelungsleiste herausgezogen..
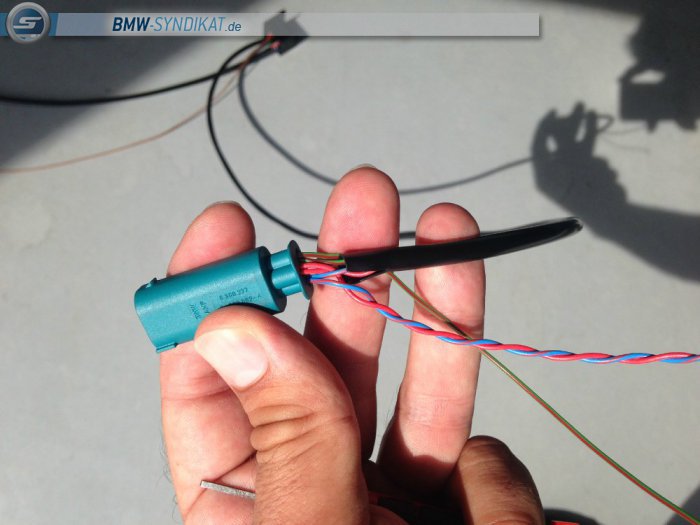
Die unten beschrieben Pins lassen sich nach hinten herausziehen, indem man vorn / an der Unterseite des Steckers mit einem Auspin-Werkzeig (oder einer Büroklammer) die Haltefeder des jeweiligen Pins herunterdrückt und gleichzeitig den Pin herauszieht. Bei diesem Stecker erfordert dies etwas Übung / Gefühl - notfalls einen BMW-Fachmann / Händler zu Rate ziehen! (dieser hat dann Spezialwerkzeug dafür!)
======================
Jetzt müssen in diesem Stecker 3 Pins ausgepinnt werden und stattdessen in genau die gleichen Positionen die gleichfarbigen Pins der insidePerformance Klappensteuerung eingepinnt werden (richtig einrasten / bis nach ganz unten schieben! Vergleiche mit den anderen Pins!)
======================
Fall A:
beim M5 / Steuergerät für Benzinpumpe:
Pin 9 (blau-rotes Kabel)
Pin 16 (rotes Kabel)
Pin 13 (grün-rotes Kabel)
Die Pin Nummer steht auf dem Stecker jeweils am ersten und letzten Pin jeder Reihe. Die Pins muss man also einfach abzählen. Pin 9 und Pin 16 sind die jeweilige letzten in den beiden Reihen. Pin 13 ist 4 Pins vor Pin 16.
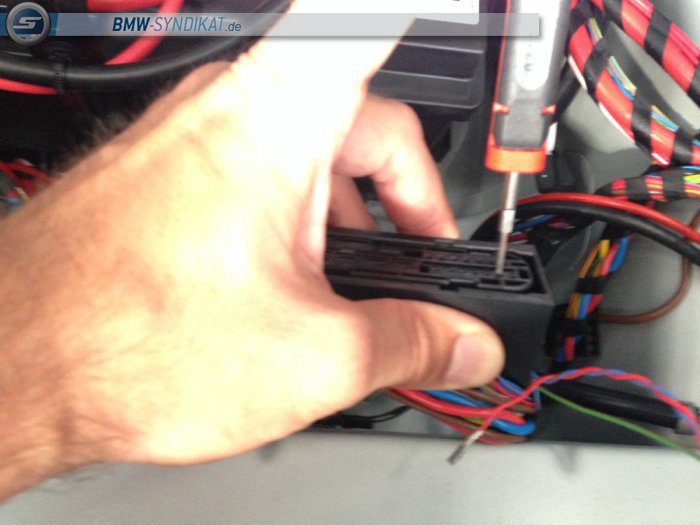
Zum Auspinnen muss durch den seitlichen Schlitz / durch das seitliche kleine Lock beim jeweiligen Pin eine kleine seitliche Nase am Pin heruntergedrückt werden, damit man den Pin herausziehen kann. Am besten z.B. mit einer Büroklammer.
======================
Fall B
M6 / M6 Cabrio und Steuergerät hinten mittig/rechts vor der Batterie:
Pin 12 (blau-rotes Kabel) - CanBus
Pin 13 (rotes Kabel) - CanBus
Pin 1 (grün-rotes Kabel) - WakeUp
Die Pin Nummer steht auf dem Stecker jeweils am ersten und letzten Pin jeder Reihe. Die Pins muss man also einfach abzählen. Um die Pins aus dem Originl-Stecker herausziehen zu können, muss seitlich die grüne Verriegelungsleiste aus dem großen Stecker gezogen werden und an der Vorderseite neben dem jeweiligen Pin durch den schmalen Schlitz mit einem Werkzeug oder einer Büroklammer die Verriegelungsnase heruntergedrückt werden:
======================
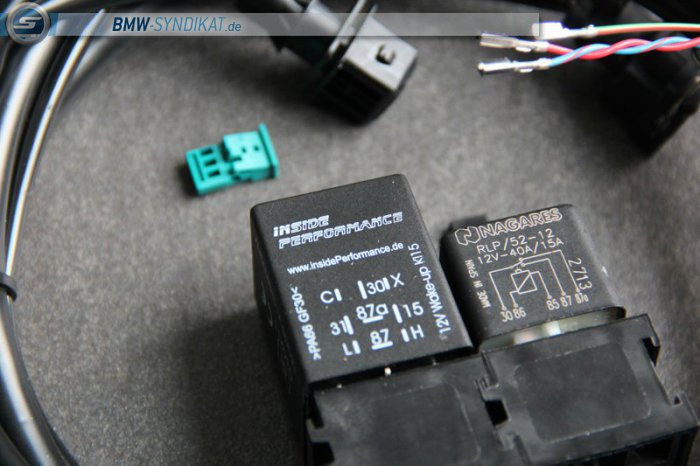
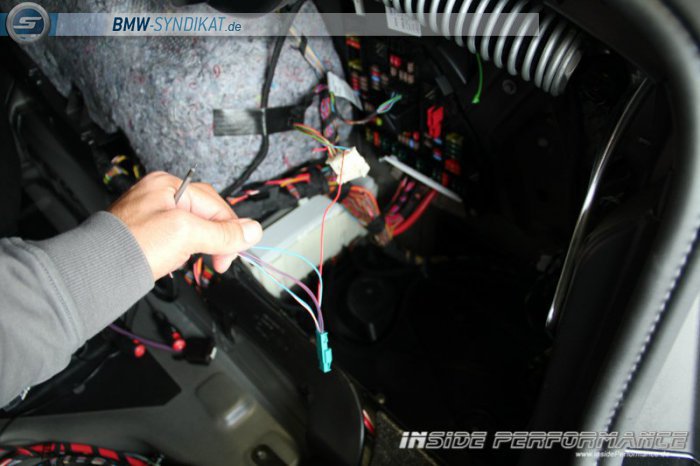
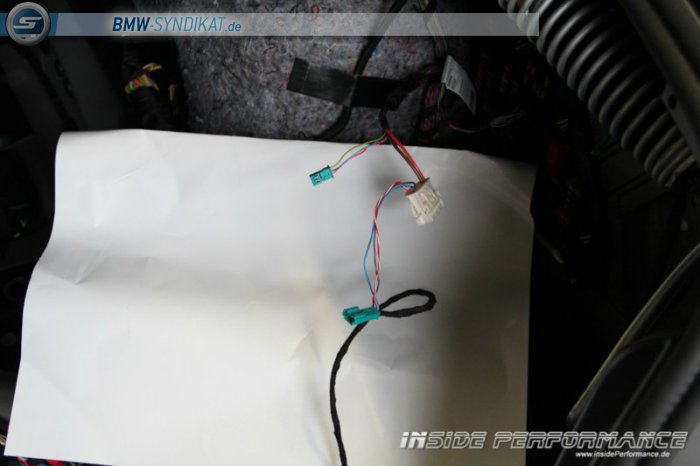
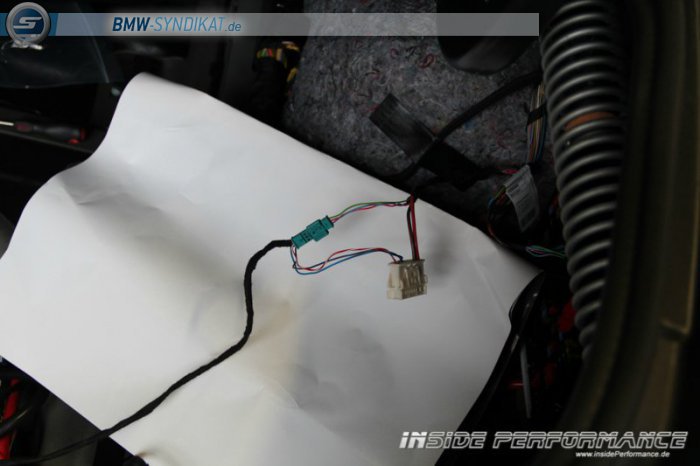
Egal ob Fall A oder Fall B ist das Prinzip danach das gleiche - nur die Stecker der Steuergeräte sehen ggf unterschiedlich aus. Besagte Pins werden aus dem Stecker entfernt und durch die vom neuen Klappensteuerungsmodul kommenden Pins mit der gleichen Karbelfarbe ersetzt:

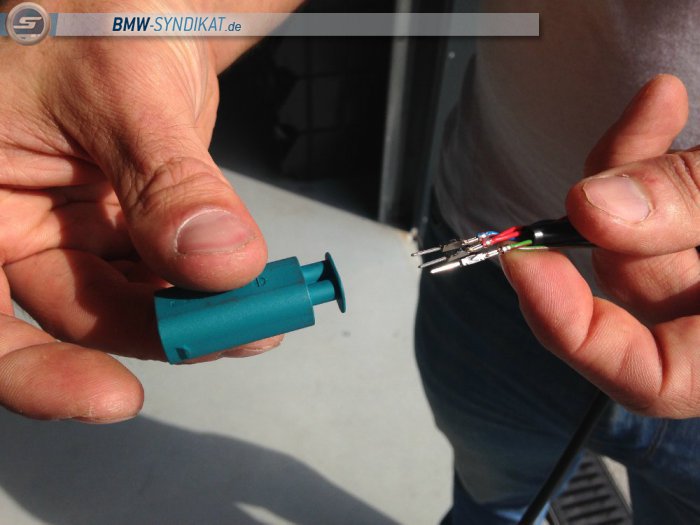
Die ausgepinnten Pins hingegen werden in den mitgelieferten grünen kleinen Stecker eingepinnt und die Halteklappe am Stecker (seitlich) geschlossen. Die Pins jeweils so dort einpinnen, daß beim Zusammenstecken des Steckert mit dem Gegenstück an der Klappensteuerung jeweils die gleichfarbigen Kabel gegenüber liegen:
Rechts in der Hecke wird dann noch an einen vorhandenen Massepunkt an der Karosserie das schwarze Massekabel mit der Öse angeschraubt:
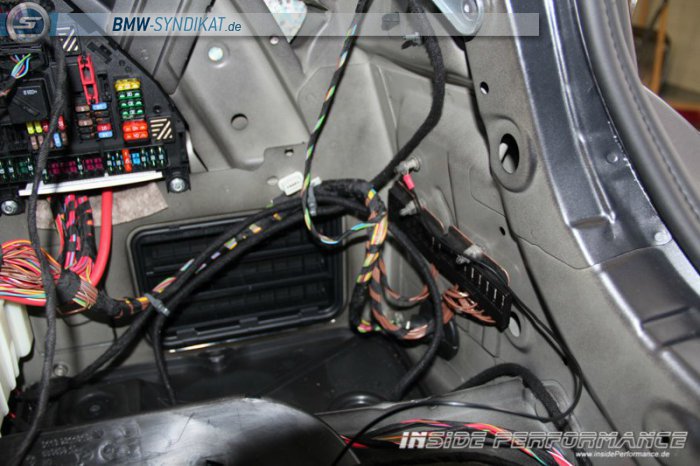

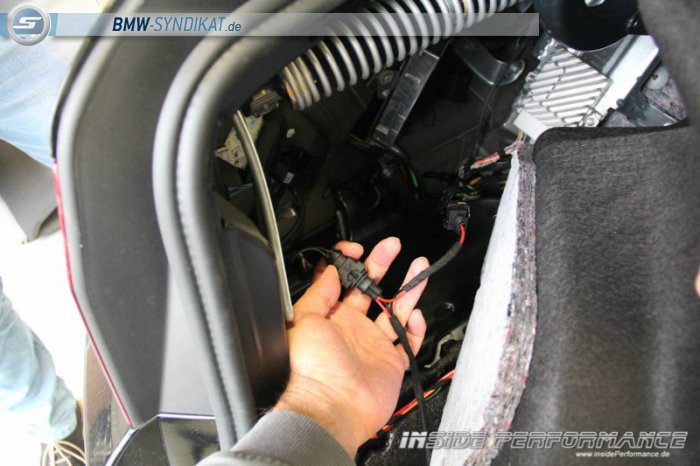
links wird dann der Stecker von der Unterdrucksteuerung abgezogen (Bügel am Stecker seitlich reindrücken). Der Stecker wird in das passende Gegenstück der Klappensteuerung gesteckt. Und der Stecker der Klappensteuerung dann wieder ins Steuergerät - sodaß eine Art Y-Verbindung entsteht:
Jetzt kann das Klappensteuergerät z.B. an die Wand rechts unterhalb von der Batterie in der Batteriewanne angeklebt werden. Das mitgelieferte Klebepad dafür verwenden - die Stelle vorher reinigen / entfetten. Darauf achten, daß später die Bodenwanne noch problemlos passt. Die Kabelstränge sauber verlegen - am besten entlang bereits vorhandener Kabelbäume. Mittels Kabelbinder befestigen:
Fertig! Jetzt den Stecker vom Benzinpumpen-Steuergerät wieder einstecken und die Funktion testen.
Läuft alles korrekt, wird alles wieder in umgekehrter Reihenfolge zusammengebaut.
Die Klappe öffnet IMMER, wenn der M1 Knopf gedrückt wurde und im Display / Kombiinstrument das M1 aufleuchtet.
Ist die M1 Taste nicht gedrückt, sollte die Klappe geschlossen sein. Es sei denn, die Motorsteuerung öffnet die Klappen sebständig (z.B. bei hohen Motortemperaturen oder nach einer schnellen Fahrt zum Abkühlen des Motors oder am ca. 4000 Umdrehungen).
Bearbeitet von: Jogi am 07.03.2014 um 17:15:20
Bearbeitet von: Jogi am 07.03.2014 um 17:22:55
Bearbeitet von: Jogi am 07.03.2014 um 17:36:16
Bearbeitet von: Jogi am 07.03.2014 um 17:38:16
Bearbeitet von: Jogi am 07.03.2014 um 17:41:52
Bearbeitet von: Jogi am 07.03.2014 um 18:14:04
Bearbeitet von: Jogi am 09.09.2014 um 13:18:29
Bearbeitet von: Jogi am 09.09.2014 um 13:52:42
Bearbeitet von: Jogi am 10.09.2014 um 16:10:45
Mitglied: seit 2005
Deutschland
Deutschland
Hallo Jogi,
schau mal hier auf eBay (klick) - da gibt es sicher etwas passendes zum Thema "!Einbauanleitung: Klappensteuerung BMW M5 - M6"!
Gruß
schau mal hier auf eBay (klick) - da gibt es sicher etwas passendes zum Thema "!Einbauanleitung: Klappensteuerung BMW M5 - M6"!
Gruß
Ähnliche Beiträge
Die folgenden Beiträge könnten Dich ebenfalls interessieren:
Installation manual for the extended sports-exhaust flap-control-system made by insidePerformance for BMW M5 and M6 (F10 / F12 / F13).
This flap-control-unit (FCU) allows you to control (open and close) the exhaust flaps whenever you want. This can be done my using the OEM M1-button on the steering wheel (on all M-Models).
That works idependant from your selection and configuration within the M-Menu (iDrive).
On non-M-models, the flaps are opened when driving in SPORT or SPORT+ driving-mode.
This FCU works with all flap controlled exhausts - independant of the manuvacturer / vendor / brand: it works with the original OEM exhaust system, the BMW Performance exhaust system, Akrapovic exhausts and all others. And of course with the insidePerformance BMW M5 flap controlled Sports-Exhaust.
Even on cold-startup of the engine, the flaps can me opened.
A detailed product description and product ordering can be found here.
Example video X6M:
First the trunk-floor has to be removed (2 nuts):
Then the platic part at the trunk border must be removed. This part is attached with some expanding rivets on the inner side.
There might be a 12V plug in this part - just jemove the plug bevore you remove the whole part (M5).
On M6 or M6 Convertible there might be 2 more silver plugs that are screwed. Use a tong to screw it out:
Now the lower trunk compartment can be removed:
On the left side of the trunk, remove 2 rivets and fold the paneling aside (or remove all rivets on that part, if you wish).
On M6 / Convertible there is an additional plug with a rope that has to be disconnected:
Behind that panel you will find the unit controlling the exhaust flaps by vacuum. There we will connect one harness of the insideperformance FCU later on:
Now remove / fold aside the right trunk panel by removing 3 rivets and one screw that fixes a trunk loop:
Now remove the compartment at the right side (rivets):
==================
Case A:
right above that, you will see another control unit (for the fuel pump).
[ on M6 / M6 Convertible this unit might not exist. In that case seel below Case B ]
Remove the plug of this unit (press the plug-nose to remove ist):
On this plug, there are small flaps on both sides of this plug that hold / secure the inner pins in that plug. Carefully open both flaps:
===============
Case B:
If this unit does not exist, just use the following unit which is mounted in front of the battery at the cars back wall:
After opening and removing the plug you can remove the back-cover of the plug:
There is also a blue plastic part in the side of the plug that fixes all pins - remove that blue retainer.
You can remove the pins that are listed below by putting a BMW special tool (or a paperclip) into the hole next to the hole of the pin itself. There is a small spring that need to be pushed down trough that hole so the pin can be removed. That is a bit tricky - if you feel unconfortable with that, ask a specialist - they have special tools for that!
===============
Now 3 pins of this plug have to be removed and replaced by the pins attached to the insideperformance FCU.
===============
Case A:
M5 / Fuel pum unit:
Pin 9 (blue-red wire)
Pin 16 (red wire)
Pin 13 (green-red wire)
the numper of the first an last pin in each row are written at the plug. Just count the pins to figure out the numers in between. Pin 9 and pin 16 should be the last in each row. Pin 13 is 4 pins before pin 16.
To remove the pins, a small spring at the side of each pin has to be pressed through a small opening at the side of the blug. Best is to use a paperclip to press it down while pulling the pin out.
===============
Case B:
M6 / Convertible - Unit in front of the battery:
Pin 12 (blue-red wire) - CanBus
Pin 13 (red wire) - CanBus
Pin 1 (green-red wire) - WakeUp
the number of the first an last pin in each row are written at the plug. Just count the pins to figure out the numers in between.
===============
Make sure to put the new pins (with the same wire color) of the FCU deep into the plug! Compare the pin position with other pins in the plug to make sure they are latched correctly.
Indepentant of Case A or Case B (plugs might look different), the mentioned Pins have to be replaces by the Pins of the FlapControlUnit - each Pin with the Pin of the same wire color:
The removed pins must be interted into the supplied green small plug and the side-plap of that plug has to be closed after all pins are inserted.
The pins have to be inserted in that way, that the wire-color matched the opposide wire-color of the other matching plug at the FCU harness:
At the right trunk corner the lug of the black FCU ground cable has to be screwed to one of the existing ground cable points at the trunk wall:
on the left wall the flug of the existing vacuum control unit has to be removed by pressing the buckle. The removed plug is connected to the matching plug at the FCU harness. And the other plug of the FCU harness is plugged into the vacuum unit. So we create a kind of Y-connection:
Nof the main FCU module can be attached somewhere - i.e. at the right wall next to (and in front of) the battery. Use the supplied glue pad. Clean both sides before you attache the glue pad.
Be carefull to leave enough room so the trunk compartment still fits in. Attach all FCU harnesses somewhere - best at existing oem harnesses. Use the supplied laces:
Now we are ready! Plug the fuel-contol-unit plug back into the unit and start to test if everything works.
If everything is fine, assemble all parts back into the trunk as you have removed them.
The flap now ALLWAYS opens, if you press the M1 button on the steering wheel and if the M1 symbol is shown at the dashboard.
If the M1 button is not active, flaps should be closed. There are some exeptions, where the flaps still can be opened - these exeptions are coursed by the engine ECU and are for engine protection. So we do not overwrite these protection settings. That might be the case after a hard drive if the engine is hot - than the engine ECU might want the flaps to be opened for cooling (independant of your selection). Or if RPM rises above about 4000RPM - that the flaps are are also opened independant of your selection.
Bearbeitet von: Jogi am 12.01.2014 um 11:20:27
Bearbeitet von: Jogi am 03.02.2014 um 15:49:48
Bearbeitet von: Jogi am 07.03.2014 um 18:07:28
Bearbeitet von: Jogi am 07.03.2014 um 18:15:09
Bearbeitet von: Jogi am 10.09.2014 um 16:12:02
Carbonteile, Sportauspuffanlagen im Performance-Look: www.insidePerformance.de!
Anzeige: